Quick Answer: Installing a Fish Finder Thru Hull Transducer
A thru hull transducer installation requires drilling through your boat's hull, securing the transducer with sealant, and routing cables to your fish finder display unit. The process takes 2-4 hours and demands precision to prevent water leaks. You'll need a drill, marine sealant, cable management tools, and basic electrical knowledge. Most boat owners can handle this DIY project successfully with proper planning and attention to detail.
Gather Your Tools and Materials
Before touching your boat's hull, assemble everything you need. Start with a drill and the correct sized hole saw for your specific transducer model. You'll need quality marine-grade silicone sealant. Don't skimp here. Poor sealant causes leaks that damage your boat and electronics.
Grab a measuring tape, pencil, and masking tape for marking your drill location. Have a utility knife ready for cleanup. You'll need cable glands, marine epoxy, and weatherproof connectors. If you're working on vehicle electronics too, tools like a BlueDriver Bluetooth OBD-II Scanner can help diagnose electrical issues on your boat's systems if you have onboard engine diagnostics.
Prepare a work area below deck where you can access the transducer from inside the boat. Have towels ready to catch water during installation. Keep a bucket nearby. Finally, review your fish finder's manual to understand cable requirements and connector types.
Selecting the Proper Installation Location
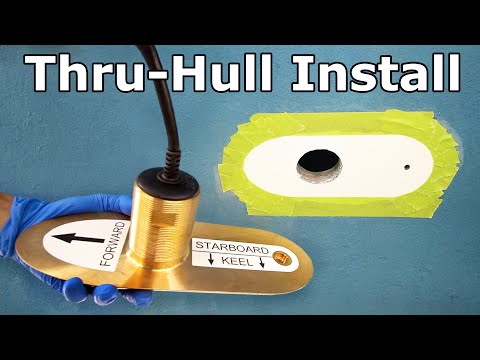
Location determines your fish finder's performance. Choose a spot on the hull that sits lower than the waterline by at least six inches. This depth ensures the transducer remains submerged during all conditions. Avoid areas with heavy turbulence near the engine intake or exhaust.
Check the inside of your hull for obstructions, wiring, and plumbing. Use a stud finder or flashlight to spot potential problems before drilling. Mark your location with tape and verify it from multiple angles. Some boats have reinforced areas on the hull that make better drilling points.
Consider cable routing inside the boat. Your transducer cable needs to reach the display unit without sharp bends or excessive length. Plan a path that avoids engine heat, moving machinery, and heavy foot traffic. Protect cables with conduit or cable ties to prevent damage over time.
Step-by-Step Installation Process
Start by protecting your drill bit and hull with masking tape. This prevents the bit from sliding during initial contact. Use a slow drill speed and steady pressure. Let the tool do the work. Rushing causes the bit to bind and ruins the hole.
Once you've drilled through, clean the hole completely. Remove debris from both sides. Dry the area thoroughly. Apply marine silicone sealant around the thru hull fitting before inserting the transducer. Press it firmly into place and let the sealant cure for the time recommended by the manufacturer. This usually takes 24 hours.
Route your cable carefully. Use cable glands at the entry point to seal and protect the wire. Apply additional marine epoxy around the gland if needed. Run cables along existing boat infrastructure using ties or clips. Avoid tight loops that kink the wire.
Connect the transducer to your fish finder display following the manual's wiring diagram. Use waterproof connectors and heat-shrink tubing on exposed connections. Double-check polarity before powering up. Test the system in shallow water before heading out. Watch for error messages or weak signals that indicate installation problems.
Maintenance and Troubleshooting Tips
Inspect your thru hull seal quarterly. Look for cracks in the sealant or water pooling around the fitting. Reapply silicone if needed. Check cable connections for corrosion and tighten any loose fittings. Keep your transducer clean. Algae and barnacles reduce signal strength.
If you notice dead zones on your display or weak readings, the transducer might be tilted. Verify it's perfectly vertical. Air bubbles near the transducer also cause poor performance. Some boats need additional hull preparation in rough sea conditions.
For those with multiple onboard systems, consider having backup power. A NOCO Boost Plus Jump Starter (1000A) keeps your fish finder running if your boat's battery fails unexpectedly. If you need professional help, find local service pros near you who specialize in marine electronics installation.
Conclusion
Installing a fish finder thru hull transducer is achievable for any boat owner willing to invest time and care. Proper planning prevents costly mistakes. Use quality materials, take precise measurements, and follow your manufacturer's instructions exactly. Your fishing success depends on a properly installed transducer that delivers accurate depth and fish data for years to come.